Tuesday, 20 August 2013

18th Century Court Ensembles Project (Or I am a lemming)


Remember the Robe de Cour-project I started two years ago? The truth is that I really did go a bit nut about it, developed a very strong aversion against my shell fabric and quit. But the foundation for the bodice is done and I “just” have to cover it, make the petticoat ad sleeves and decorate it. So when Kendra of Demodé announcedthat she going to make one, and wouldn’t it be nice if more did too, well, what excuses have I left?

 
But as so often when it comes to costume, I got all contrary with myself and quickly decided that what I really want is the court gown that became the official court wear in Sweden in the 1770's, Gustaf III’s national suit. And I don’t want the black one which I already have the fabric for, but the gala version, which is in white with pale blue decorations. The gown consists of the parts, a sleeveless bodice, a petticoat worn with pocket hoops and a robe with a train, which is worn a la polonaise. The sleeves have the distinctive lattice decoration, which is more striking in the black version than the white, I admit. The national suit wasn’t supposed to change with fashion, but of course it did anyway, and I plan to make mine late 1780. That is purely because J has the gala version for men, which is pale blue with white details, and his is from that period.

There are, as far as I know, no paintings of the gala version, but here is a drawing.
 
Source
 
The only extant gown preserved is one in the version for ladies who hasn't been presented at court, de difference is no latticed sleeves and the train is shorter.

Worn as wedding gown by Sofia Lovisa Brüch in 1780
 

Monday, 19 August 2013

Starting the 1630's gown


Vacation is over and a nice vacation it was too, I have no complaints at all. Now I have a tremendous backlog of blogs to read- it will probably take me a week or so. My sewing plans for the rest of the year is to continue to finish my already started to project. I haven’t been completely good there; I have started a few completely new ones this year. The current example is a striped 1790’s gown. I’m making it completely by hand and am just about to set the sleevils. I have also, finally, started the 1630’s gown! I have been a bit angsty over the pattern, but then I realized that I could use my 1790’s stays. It may sound strange, but actually makes sense, because the back seam is placed in just about the right place and it is also raised to hit just above the waist.
So I traced the stays onto paper, and then draw in the right shape for the bodice. The pattern for the original can be found in Seventeenth-Century Women's Dress Patterns by Jenny Tiramani and Susan North. The foundation is in linen canvas, enforced by both buckram and boning, and it seems likely that it could be used without stays and that is how I want to interpret it. There is a problem with that with the original because the front is laced with a panel that is just about 10 cm high, stopping well beneath the bust. As breasts were not left to roam free, this may mean that stays were worn underneath it, but it can also mean that a now missing, boned stomacher was worn with it.

Here is the finished pattern. The original lines of the stays can be seen as a faint line. The pattern has a narrow back piece and a long front/back piece as well as the lacing panel. The areas shaded with blue are reinforced with heavy buckram and the red with a lighter weight. I haven’t drawn in the boning channels, but there are horizontal ones at the back and a few for every reinforced part. The original has much wider boning than I have, so I will have more boning channels. I will also sew it on machine; the canvas and buckram are much too hard to my hands for something else.
 

After a quick fitting it was clear that the back was too wide and the shoulder straps too long, but that are easy fixes. I also decided against a stomacher and will instead raise the front almost up the faint lines of the stays. It is purely for comfort, from experience I know that an extra stomacher in stays is fiddly and my heavy bosom wants to escape, it is better to have all together. This might not be the period correct way of doing it, but I feel that it will be the best solution for me. A slender person with a smaller bust could probably use the stomacher option with excellent results.


Excuse the terribly crooked shift, that is also inisde out.
I had intended to find buckram in two different weights, but I also wanted to start this project now, so instead I will use the same linen canvas as the foundation instead of the heavy buckram. I am currently sewing the boning channels and pad stitch the various interfacings to the foundation. The shell fabric basically uses the same pattern, only it is longer with slashes for the gussets. Each pattern piece will be finished with foundation and shell fabric before the whole bodice is to be assembled. There are also wings to be cut, boned and covered with fabric and, of course, the enormous sleeves. All in dark purple taffeta.


Sunday, 11 August 2013

Making a 17th century shirt- The finished shirt

Yesterday I took the very last stitches and I'm quite pleased and so is J. As this is the very first item of his 17th century outfit the pictures are a bit out of context, I think it will look a lot better with the proper clothes! I have a feeling the sleeves are a bit too long, but then they have the same measurements as the original shirt, so with the proper jacket it may be perfectly fine. For the moment the ties are made out of cotton tape, but as soon as I find linen tape I am going to change them. I was terribly afraid that the collar would be too narrow, but it is perhaps a bit too wide. The shirt is completely hand sewn and I started it two months ago, though I can't say that I have stithed on it daily.

Previous posts:

Preparations and cutting


The cuffs are made exactly the same way as the collar, except that the sleeve is evenly gathered and has buttonholes at the ends for the ribbon that ties them.

 
The slit in the sleeve has a tiny, 0.5 cm long bar worked in buttonhole stitch to prevent tearing.


Tuesday, 6 August 2013

18th century days at Skansen

I am still on vacation, which is why I'm so quiet and is having a good time. I have ventured into new areas of cyberspace and is testing both Instagram and Twitter. I plan to keep them Close to this and Madame Isis Toiltte in subject and if you are interested, then the accounts are both called isiswardrobe. There will be cat and dog Pictures, though. And, of course, I have spent some time in the 18th Century. The museum Skansen had their annual 18th Century weeks in July and as usual Gustafs Skål was there to add to the amusement. I also got a chance to try out some coloured hair powder, which you can see here.

Looking sweet. Also having pink hair powder.

Tove the maid is looking extremely dubious.

Back to nature.

On day two I left the 1780's and went for the 1740's instead.


A temporary change of cavalier as Anders was the only other one dressed in the 1740's, wearing a quilted waistcoat with sleeves.
The Lovely Little gazebo in the garden was open for once, so we could go inside and see the painted interior.


J looking like he is contemplating life's sorrows this beautiful day.

Aggi, the stern governess.

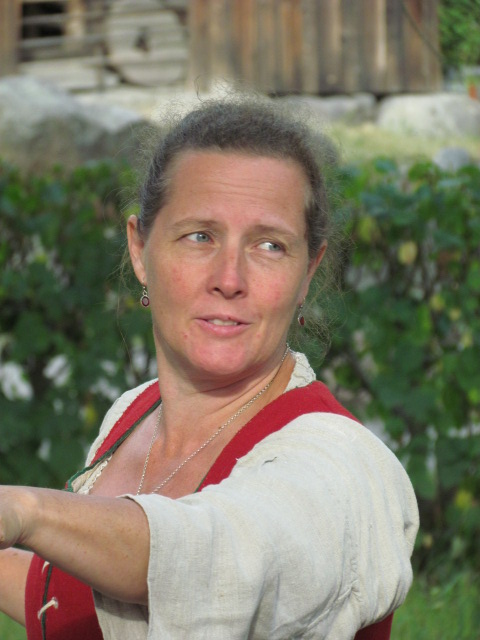
J in the Swedish national suit, everyday court version.


The fortune teller and her cards. She foresaw that a visiting squirell would be able to succesfully steal something, just moments before he jumped up at our table and got away with a tasty morsel.


Friday, 26 July 2013

On instant gratification and long time goals


The Reader by Jean-Honore Fragonard, 1771
All in all I am in a very good place right now. Relationship, family, living, work, economy, health, they all work and I’m very happy about it. But there are a few kinks that I’m working on and one is the kick of instant gratification. You get it when you blog- I love getting comments on what I write and it is great for the Ego when I have made something and it gets admired. Instant gratification is around when I shop all those nice things that I don’t really need, and I don’t go over my limit, so why worry. For example- I generally feel that I’m allowing myself the easy way out on several aspects of my life right now and I would like that to change, to give myself what I really want, even if it takes a bit longer and doesn’t get as much attention.

I want to travel more than I have. I want to go back to Rome, Paris, London and Edinburgh. I want to see new places like Prague and Venice, for example. And I know that a bit of not spending so much of what I don’t really need would go a long way toward that. As for now, J and I have decided to let September be a non-spending month, apart from bills and groceries. I think it will be easier if we do it together and can cheer each other.

As for blogging, well, the instant gratifications are only part of it and not even the biggest part either. Another reason is because I’m a compulsive writer. I wasn’t always, but ten years ago I saw a picture online that triggered something and I started to write and since then I haven’t stopped. I write stories and I blog because I love to write. It isn’t always easy, but if I don’t write I feel a bit odd. I certainly don’t want to bash blogging, I love it, but I have, for quite some time, felt the need to write something with a little more weight, something lasting. I have wanted to write a book.

And for the same amount of time I have struggled with little demons that tells me that I don’t write well enough, that it won’t be interesting enough and that no one will want to print it, but in the end, what I really feel, is that it doesn’t matter if I’m not good enough for other, because I need to write this for me. Even if no one else reads it, I want this for myself. I have already blown the whistle at Madame Isis Toilette, so some of you already now that I have swatted away my demons and have started writing a book on 18th century beauty and makeup. I have a lot of fun right now, researching, trying out recipes and writing. I want o write a book with accurate history, doable beauty recipes and makeup tutorials and I know that is an interesting enough subject and I will do my best to make it good enough for others to read as well.

But this also means less blogging. I’m not going it up, because I still sew and it isn’t a chore at all to blog about sewing, but other kinds of posts will have to stand back for book writing. Less instant Ego stroking for me, but I think the more long term reward will make up for it.


Sunday, 21 July 2013

18th Century Hair & Wig Styling: History & Step by Step Techniques

I'm on vacation and hadn't planned to post in a while- Internet in the archipelagio outside Stockholm isn't the best, but this is exiting news and I want to share. I am sure that most of you already know about Kendra of Démodé and have already caught wiff of her upcoming book, 18th Century Hair & Wig Styling: History & Step by Step Techniques. But in case you haven't, then I hope that you feel as exited as I over the chance of getting a book with how-to's for 25 hairstyles. There is a FB-page here.

Wednesday, 10 July 2013

Making a 17th century shirt- setting in the sleeves and the gussets

The shirt is nearing its completion, the only thing left are the cuffs. The sleeves are very wide with only a portion of that gathered at the top of the shoulder. As with the collar, the body of the shirt is top-stitched to the sleeves.
 
 
The seam allowance are folded and sewn down invisibly, creating a false French seam. On the original shirt this is done on the side and sleeves seams.
 
 
Where the gathers are there is a strip of linen tape sewn over them. Probably because it would be too bulky to fold in the seam allowance. The inside looks very neat.
 
 
The gusset is a small rectangle, 8X8 cm when hemmed.
 
 
As my fabric doesn’t have selvedges, the fake French seams the original has would be much too bulky. Instead I sewed in the gusset from the right side. I always start with sewing the gusset from the corner were sleeves and bodice meet, first down the sleeves side, and then from the corner down the bodice side. After that I fold it so it meets the other side where the sleeve and bodice meet and repeat. Only I continue down the sleeve seam down the whole way, apart for a 10 cm long slit. Then I do the side seam the same way. As my shirt is shorter than the original one, my side split are much shorter, but start at the same place as the original, 46 cm down.
 
 
The gusset in place.
 
 
The side split is reinforced on the wrong side with a small rectangle of linen, 3X2 cm when hemmed.
 
 
The next post with show not only the cuff, but also the finished shirt.

Related Posts Plugin for WordPress, Blogger...